Fudge Troubleshooter & Science Checker
Select the issue you are experiencing with your batch:
Crystal Size Matters
Microscopic crystals create a creamy melt. Large crystals cause grittiness. No crystals result in sticky fondant.
The Maillard Reaction
Proteins + Sugars + Heat = Complex nutty/toasted flavors that distinguish fudge from plain sweet syrup.
Fat's Role
Dairy fat coats sugar crystals, preventing them from bonding too tightly, ensuring a smooth mouthfeel.
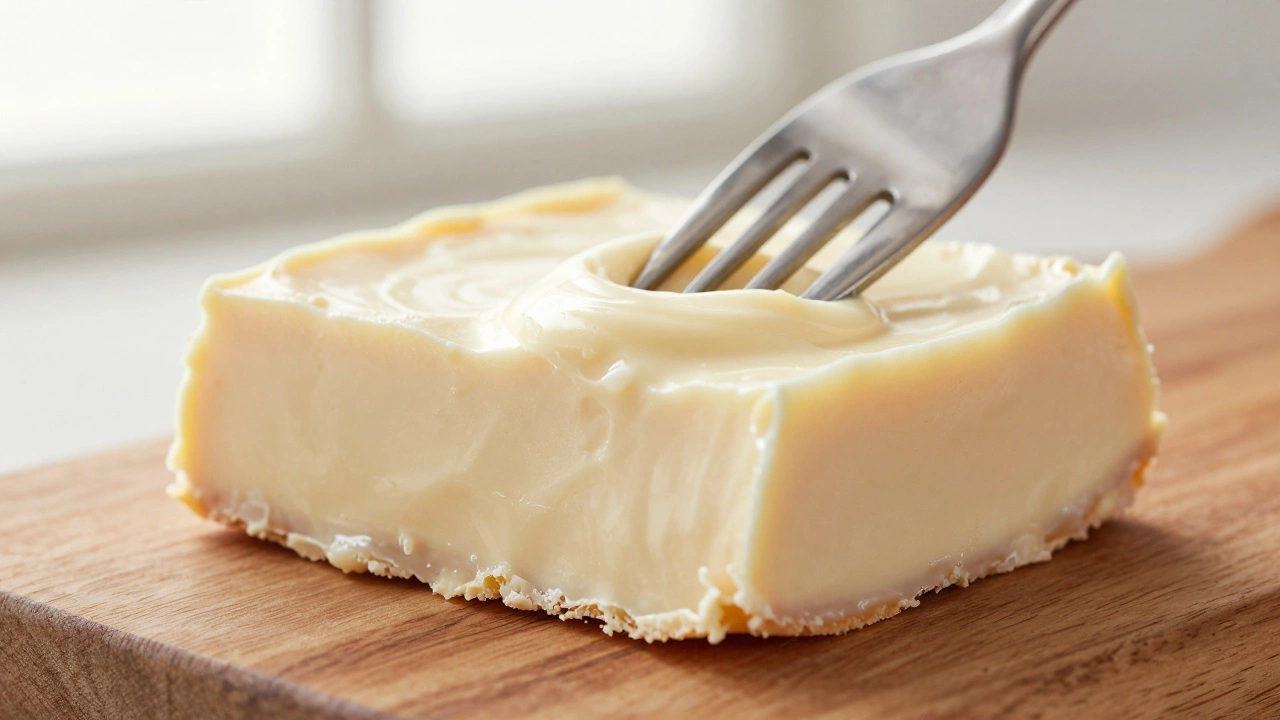
There is a specific sensation that happens when you bite into a perfect square of fudge. It should melt on your tongue with a creamy, almost velvety texture, releasing a rich flavor that balances sweet dairy with deep caramel notes. But have you ever wondered why it tastes exactly like *fudge*? Why doesn't it just taste like warm milk and sugar? The answer lies in a delicate chemical dance between heat, agitation, and crystal structure.
If you've ever made fudge only to end up with a hard brick or a sticky mess that won't set, you know that this confection is less forgiving than chocolate chip cookies. The difference between a professional-quality treat and a kitchen disaster often comes down to understanding what makes fudge taste like fudge at a molecular level. Let's break down the science behind this beloved British and American classic.
The Role of Sugar Crystallization
The defining characteristic of fudge is a soft, creamy candy made by boiling sugar, butter, and milk or cream until it reaches the soft-ball stage, then beating it to form small sugar crystals. Without those tiny crystals, you wouldn't have fudge; you'd have fondant or hard candy. The goal in making fudge is to encourage the formation of millions of microscopic sugar crystals while preventing them from growing too large.
| Crystal Size | Texture Result | Cause |
|---|---|---|
| Microscopic (Ideal) | Creamy, smooth, melts easily | Proper cooling and vigorous beating |
| Large | Grainy, sandy mouthfeel | Insufficient beating or seed crystals |
| No Crystals | Sticky, chewy, or hard | Undercooked or overcooked syrup |
When sugar dissolves in water during the boiling process, it forms a supersaturated solution. As this mixture cools, the sugar wants to return to its solid state. If left alone, large crystals would form, resulting in a gritty texture. By beating the mixture vigorously as it cools, you introduce air and create thousands of nucleation sites where new crystals can start forming. This competition for available sugar keeps each individual crystal tiny enough that your teeth can't detect them, creating that signature smoothness.
The Importance of Temperature Control
You cannot rely on guesswork when making fudge. The temperature of the sugar syrup determines the final texture more than any other factor. Most traditional recipes require bringing the mixture to the "soft-ball stage," which occurs between 112°C and 116°C (234°F to 241°F). At this precise temperature range, the syrup has lost enough water through evaporation to allow proper crystallization upon cooling.
If you stop heating too early, there will be too much water in the mixture. The result is fudge that remains soft and never sets properly, often sticking to the wrapper. If you go too far into the "hard-ball stage" above 120°C (248°F), the fudge will become dense and difficult to cut, sometimes developing a slight bitterness from excessive caramelization. A reliable candy thermometer is an essential tool for measuring the exact temperature of sugar syrups to ensure proper cooking stages isn't just a suggestion-it's mandatory for consistent results.
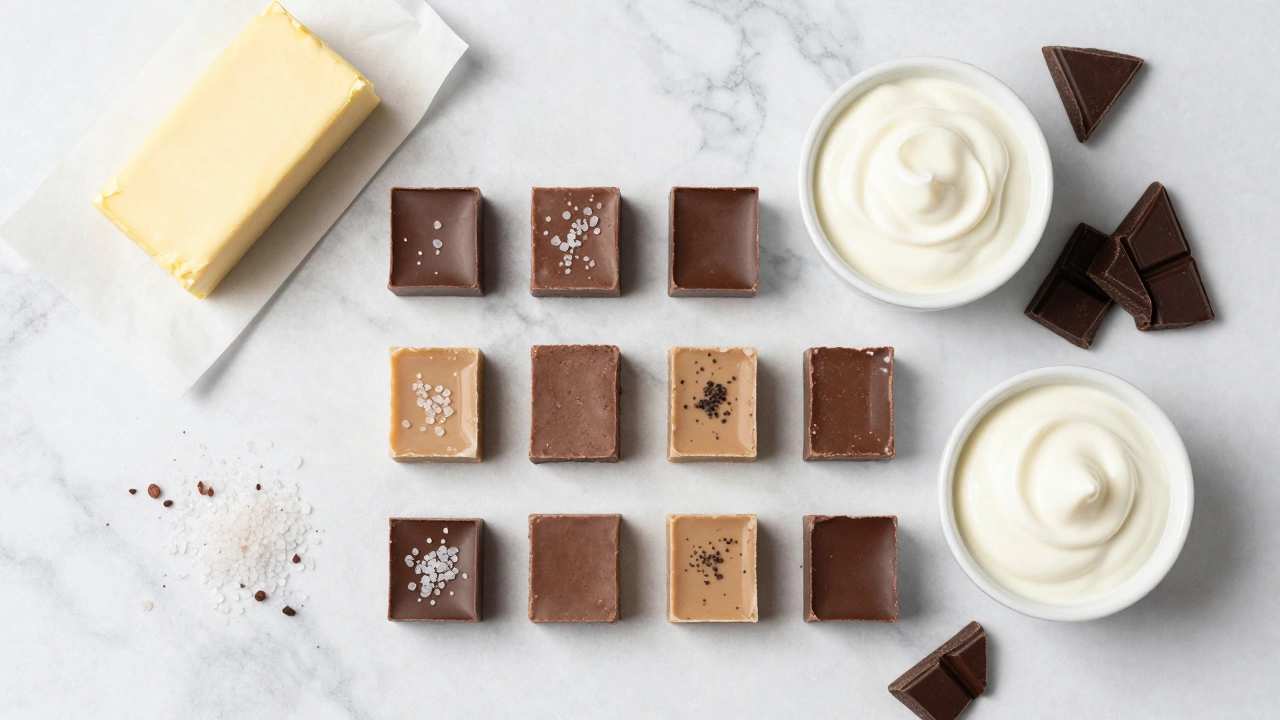
Dairy Content and Flavor Development
While sugar provides the structure, dairy provides the soul of fudge. Traditional recipes call for heavy cream or whole milk, but many modern variations use condensed milk or even evaporated milk. The fat content in dairy plays two crucial roles: it coats the sugar crystals to prevent them from bonding together too tightly, and it contributes to the luxurious mouthfeel that defines premium fudge.
Butter is another critical component. Adding unsalted butter after removing the pot from heat introduces additional fat and water, which helps interrupt crystal growth further. This emulsification process creates a smoother texture and adds a subtle richness that plain sugar cannot achieve. In the UK, where dairy quality is generally high, using fresh cream from local producers can make a noticeable difference in the final product compared to using powdered cream alternatives.

The Maillard Reaction and Caramelization
Fudge gets its distinctive color and complex flavor profile from two chemical reactions: the Maillard reaction and caramelization. These processes occur when proteins and sugars are heated together. Unlike simple sweetness, these reactions produce hundreds of different flavor compounds that give fudge its depth.
The Maillard reaction happens between amino acids in the milk proteins and reducing sugars. This creates nutty, toasted notes that distinguish fudge from plain white chocolate. Caramelization occurs when sucrose breaks down under heat, producing buttery, toffee-like flavors. The balance between these reactions depends on how long you boil the mixture and whether you add ingredients like vanilla extract or cocoa powder toward the end of the cooking process.
Traditional vs. Buttercream Fudge Methods
Not all fudge follows the same path. There are two main approaches to making fudge: the traditional boiled method and the buttercream method. Understanding the difference helps explain why some recipes seem easier than others.
- Traditional Boiled Fudge: Requires precise temperature control, constant stirring, and patience. Results in a denser, firmer texture with a longer shelf life of 2-3 weeks when stored properly.
- Buttercream Fudge: Also known as no-cook fudge, this method uses pre-cooked condensed milk mixed with butter and sugar. It requires no thermometer and minimal effort, but produces a softer, more spreadable consistency that lasts only 5-7 days.
Both methods create authentic fudge, but they appeal to different skill levels and occasions. Traditional fudge is better for gift-giving because it holds its shape well, while buttercream fudge works perfectly for quick treats or baking fillings.
Troubleshooting Common Fudge Problems
Even experienced cooks encounter issues with fudge. Here are the most common problems and their solutions based on the science we've discussed.
- Grainy Texture: This usually means the crystals grew too large. Next time, ensure you beat the mixture immediately once it begins to thicken slightly off the heat. You can also try adding a tablespoon of corn syrup to interfere with crystal formation.
- Hard Brick: Your syrup was cooked too long. The excess water evaporated, leaving a rigid mass. To fix it, gently reheat the fudge with a splash of milk until pliable, then re-beat it.
- Soft and Sticky: The syrup didn't reach the correct temperature. More water remains in the mixture. Unfortunately, this batch may need to be remade, as reheating risks burning.
- Separation: If your fudge looks oily or curdled, you likely added cold ingredients too quickly to hot syrup. Always temper additions by warming them slightly first.
Flavor Variations That Work
Once you understand the base chemistry, experimenting with flavors becomes straightforward. The key is knowing when to add ingredients so they don't disrupt the crystallization process.
Add-ins like nuts, chocolate chips, or dried fruit should be folded in during the final beating stage, not during boiling. Heat-sensitive ingredients like vanilla extract, liqueurs, or citrus zest should be added after removing the pot from heat to preserve their volatile aromas. For chocolate fudge, melt high-quality dark chocolate into the cooled syrup rather than boiling cocoa powder directly, which can seize and create lumps.
In Bristol, where artisanal food culture thrives, I've seen local makers experiment with sea salt flakes, Earl Grey tea infusions, and even locally sourced honey. Each variation respects the core principle: maintain the crystal structure while enhancing the flavor profile through complementary ingredients.
Storage and Shelf Life
Proper storage ensures your fudge stays fresh and maintains its ideal texture. Wrap individual squares in wax paper or parchment, then place them in an airtight container. Store at room temperature away from direct sunlight. Avoid refrigeration unless the recipe contains perishable fillings like fresh fruit or custard, as cold temperatures can cause sugar bloom-a harmless whitish coating that affects appearance but not safety.
Well-made fudge keeps for up to three weeks. If it begins to dry out, place a slice of bread in the container overnight; the fudge will absorb moisture and soften again. This trick works because the starch in bread releases water vapor slowly, rehydrating the candy without making it soggy.
Why does my fudge turn out grainy instead of smooth?
Graininess occurs when sugar crystals grow too large during cooling. This typically happens if you don't beat the mixture vigorously enough or if you let it sit undisturbed while thickening. To prevent this, start beating as soon as the mixture shows signs of thickening, and consider adding a small amount of corn syrup or cream of tartar to interfere with crystal formation.
Can I make fudge without a candy thermometer?
Yes, but it requires practice. You can use the cold water test: drop a small amount of syrup into ice water and check its consistency. At the soft-ball stage, the syrup will form a flexible ball that flattens when removed from water. However, a thermometer provides accuracy and reduces trial-and-error waste.
What is the difference between traditional fudge and buttercream fudge?
Traditional fudge involves boiling sugar, butter, and milk to precise temperatures before beating. Buttercream fudge mixes pre-cooked condensed milk with butter and sugar without boiling. Traditional fudge is firmer and lasts longer, while buttercream fudge is softer, quicker to make, and best consumed within a week.
Why do recipes call for scraping the sides of the pan?
Scraping the sides prevents sugar crystals from forming on the edges of the pan, which could act as seeds for larger crystals in the mixture. Using a wet pastry brush to wash down the sides helps dissolve any stray crystals and promotes uniform crystallization throughout the batch.
How do I know when my fudge is ready to pour?
Your fudge is ready when it reaches the soft-ball stage (112-116°C / 234-241°F) and begins to thicken slightly as it cools off the heat. It should lose its glossy shine and appear matte. Pour it onto a prepared surface immediately and begin beating while it's still warm but cool enough to handle.