Good fudge doesn’t happen by accident. It’s not just chocolate melted with sugar and stirred until it cools. That’s how you get grainy, greasy, or hard-as-rock disappointment. Real fudge-smooth, rich, and melt-in-your-mouth-comes from understanding a few simple rules that most recipes leave out. If you’ve ever bitten into a piece of fudge that crumbled or tasted like sweet paste, you’re not alone. The difference between okay fudge and truly great fudge isn’t about fancy ingredients. It’s about temperature, timing, and technique.
The Three Things That Make Fudge Good
There are exactly three things that separate good fudge from bad: crystallization control, fat balance, and cooling speed. Get these right, and you’ll make fudge that lasts for weeks without drying out or turning gritty. Get them wrong, and even the best chocolate won’t save you.
First, crystallization. Fudge is a sugar suspension. When sugar dissolves in liquid and then cools, it can form tiny crystals-or big, unpleasant ones. Big crystals = grainy texture. That’s why stirring while the mixture is hot is a disaster. You’re not helping it set-you’re forcing sugar to form crystals too early. The trick? Don’t touch it until it’s cooled to 110°F (43°C). Let it sit undisturbed, then stir like you mean it.
Second, fat. Real fudge needs butter. Not margarine. Not coconut oil. Real butter. It’s not just for flavor-it stops sugar crystals from growing too large. Butter coats the sugar molecules. Without enough fat, you get a chalky mouthfeel. Most recipes call for 1/4 to 1/2 cup of butter per 2 cups of sugar. Don’t cut it. And don’t use low-fat versions. You’ll regret it.
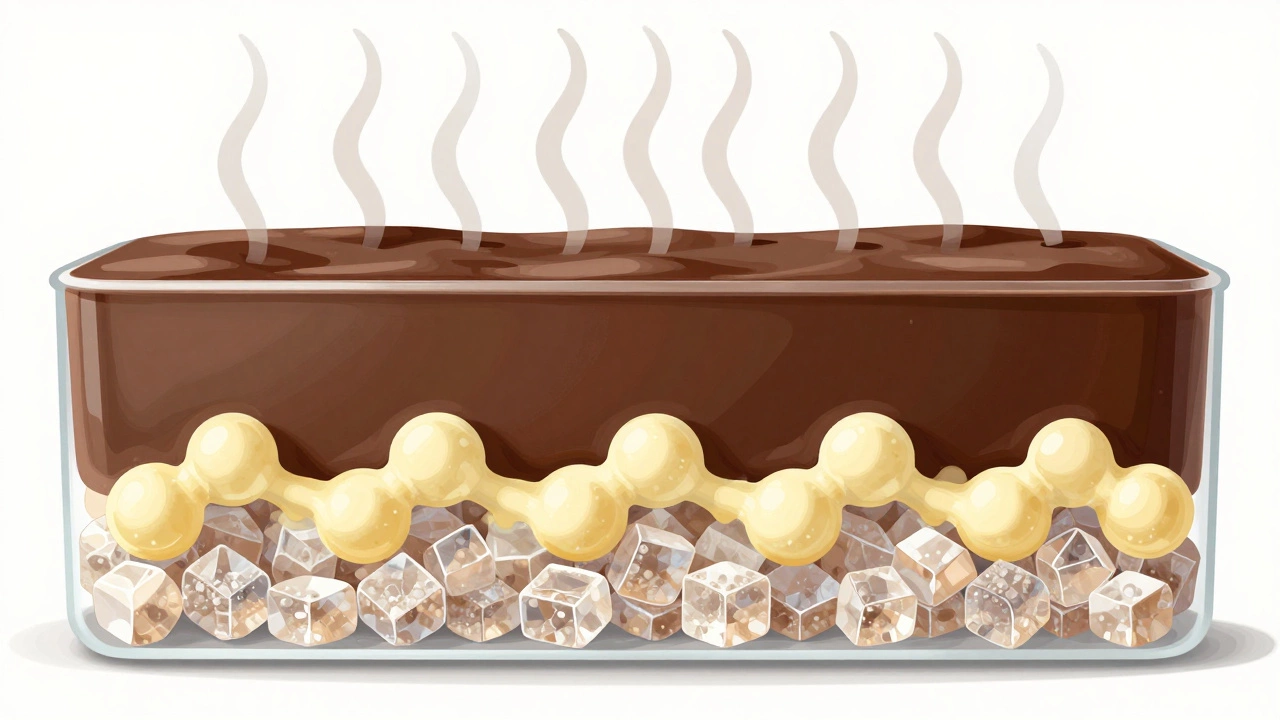
Third, cooling. Fudge must cool slowly at room temperature, uncovered. Put it in the fridge? You’ll get condensation. Wrap it too soon? Steam softens the surface and makes it sticky. Let it sit for 2-3 hours on the counter. The slow drop in temperature lets those sugar crystals form evenly-microscopically small. That’s what gives fudge its velvety feel.
Ingredients That Actually Matter
You don’t need expensive chocolate to make good fudge. But you do need the right kind. Use baking chocolate-blocks or chips labeled for melting-not chocolate bars meant for eating. Chocolate bars have stabilizers and extra cocoa butter that interfere with setting. Baker’s chocolate (like Ghirardelli 60% or Cadbury Dairy Milk baking bars) melts cleanly and sets firm.
Granulated white sugar is non-negotiable. Brown sugar? It adds moisture and flavor, but too much makes fudge too soft or sticky. If you want a deeper taste, add 1-2 tablespoons of dark brown sugar. Not half a cup. Stick to the ratio: 2 parts sugar to 1 part chocolate by weight. That’s the sweet spot.
Condensed milk is a shortcut many people love. It’s fine for beginner recipes, but it changes the texture. Fudge made with condensed milk is softer, chewier, and less rich. It’s more like caramel. If you want traditional fudge-dense, buttery, and slightly firm-stick to cream, butter, and sugar. The cream should be heavy (at least 36% fat). Light cream won’t set properly. Evaporated milk? Too thin. You’ll end up with fudge that won’t slice cleanly.
Temperature Is Everything
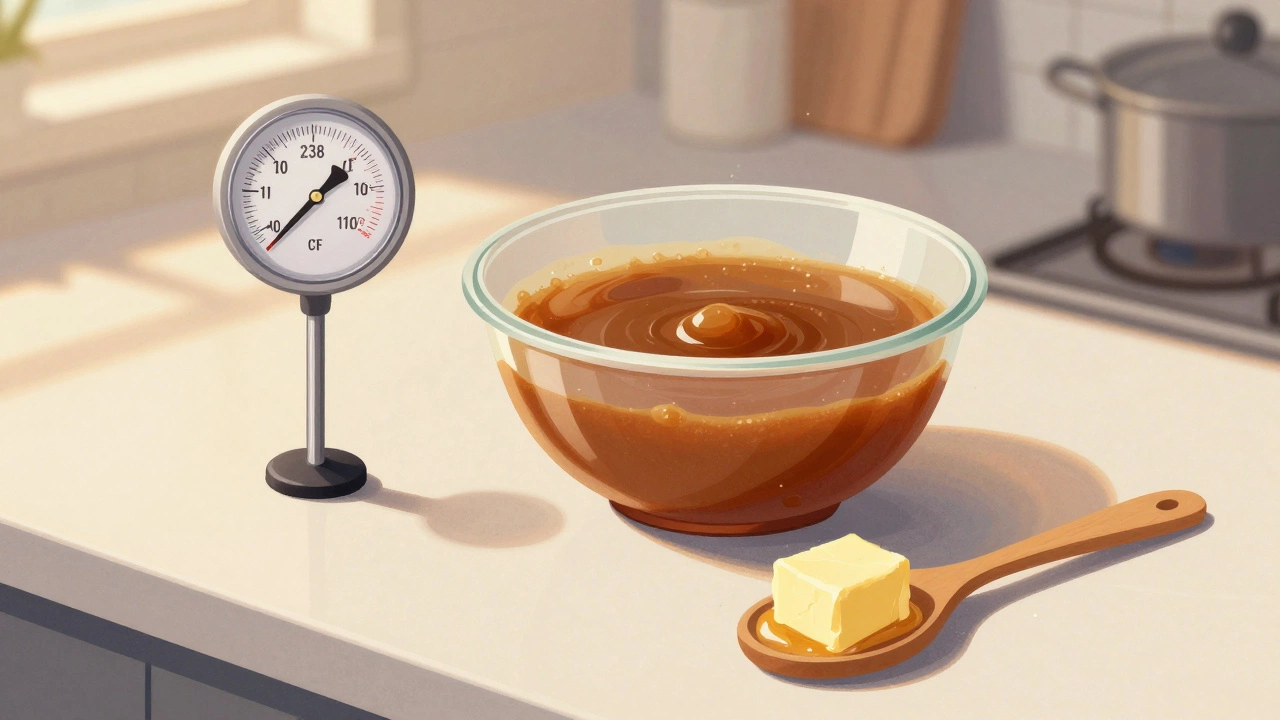
No thermometer? You’re flying blind. Fudge isn’t like cookies where you eyeball it. Sugar syrup needs to reach the soft-ball stage: 234-240°F (112-116°C). That’s the exact point where the water content drops enough for the sugar to hold its shape when cooled, but not so much that it hardens into candy.
How do you test without a thermometer? Drop a small spoonful into ice water. If it forms a soft, pliable ball you can pinch between your fingers, you’re good. If it’s too runny, keep cooking. If it’s hard and cracks, you’ve gone too far. That’s fudge that’ll break your teeth.
Boiling too long? You’ll get brittle fudge. Undercook it? It stays sticky and won’t hold its shape. The difference between 234°F and 240°F is only six degrees-but it’s the difference between perfect and pile-of-sugar.
And here’s the part most people skip: once it hits the right temperature, take it off the heat immediately. Don’t let it sit on the burner. Residual heat will push it past the target. Let it cool to 110°F before stirring. That’s when you add vanilla, nuts, or sea salt. Stir slowly for 2-3 minutes until it thickens slightly and loses its shine. That’s when you pour it into the pan.
Common Mistakes (And How to Fix Them)
Grainy fudge? You stirred too soon. Next time, wait until it cools to 110°F. No exceptions.
Fudge too soft? You didn’t cook it long enough. Use a thermometer. If you don’t have one, test the water drop method. And make sure you’re using heavy cream-not half-and-half.
Fudge too hard? You cooked it past 240°F. It’s still edible-just crumbly. Grate it over ice cream or crush it for brownie topping. But next time, pull it off the heat at 238°F.
Oil separating? That’s usually from overheating the chocolate or using low-quality chocolate. Melt chocolate gently. Don’t microwave it on high. Use a double boiler or low heat on the stove. Stir constantly.
Sticking to the pan? Line it with parchment paper. Don’t grease it unless the recipe says to. Butter on the pan can interfere with setting. Parchment gives you a clean lift.
Flavor Variations That Work
Classic chocolate fudge is the foundation. But once you’ve nailed the basics, you can play. Add 1/2 teaspoon of espresso powder-it deepens the chocolate without tasting like coffee. A pinch of sea salt on top before it sets? Game-changer. Crushed peppermint candies? Perfect for holidays.
Try peanut butter swirls. After pouring the fudge into the pan, dollop 1/4 cup of smooth peanut butter on top. Use a knife to swirl it in. Don’t overmix. You want ribbons, not a uniform blob.
For a nutty crunch, toast your pecans or walnuts first. Raw nuts can taste dull or bitter. Toast them in a dry pan for 5 minutes until fragrant. Let them cool before folding in.
White chocolate fudge? Swap half the dark chocolate for white. Add a splash of vanilla and a pinch of salt. It’s sweet, but the salt balances it. Don’t overcook it-white chocolate burns easier than dark.
Storage and Serving
Good fudge keeps for up to 3 weeks if stored properly. Layer it in an airtight container with parchment between each layer. Don’t stack it directly. It’ll stick. Keep it at room temperature. Fridge storage? Only if your kitchen is hot and humid. Bring it back to room temp before serving-cold fudge loses its richness.
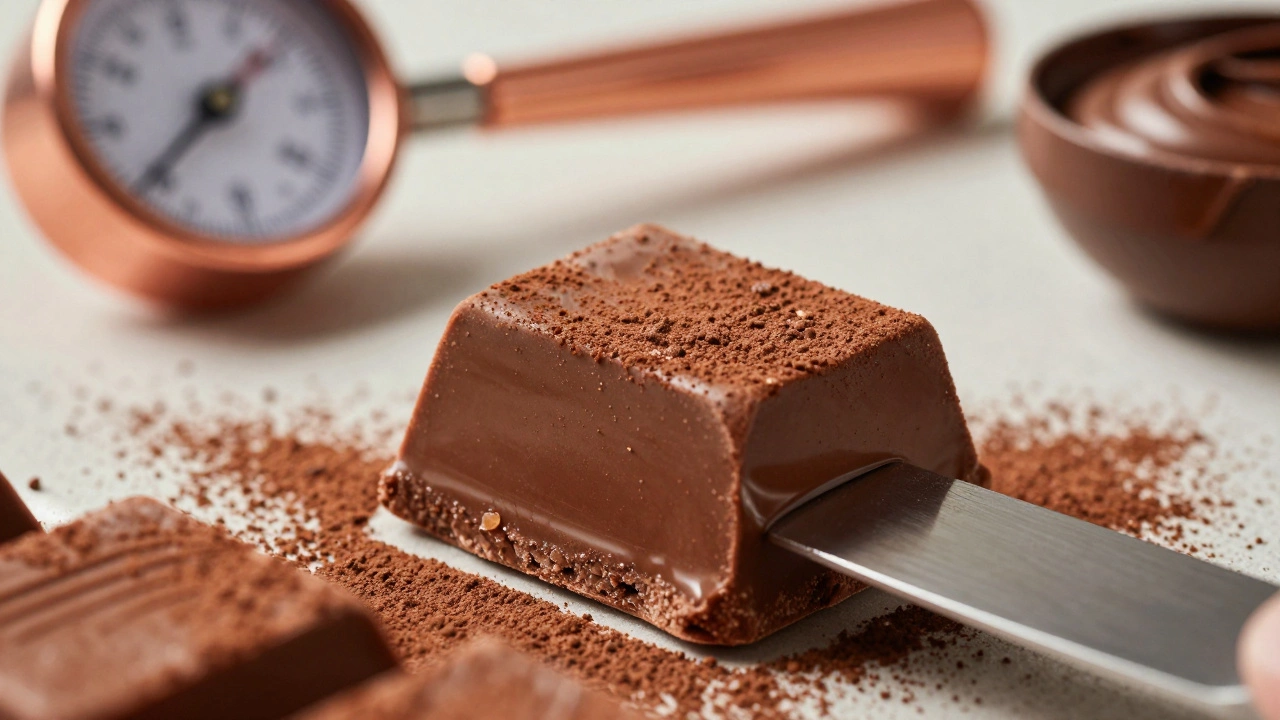
Serve it cut into 1-inch squares. Use a sharp knife. Wipe it clean between cuts with a hot, damp cloth. That keeps the edges neat. A little dusting of cocoa powder or powdered sugar looks elegant and prevents sticking.
Make it for gifts? Wrap each piece in wax paper and twist the ends. Tie with ribbon. It looks homemade-and tastes even better.
Why This Works Every Time
There’s no magic here. Just science. Sugar behaves predictably. Butter does its job. Heat controls the outcome. Once you stop guessing and start measuring, fudge stops being a gamble. It becomes reliable. And that’s what makes good fudge-not the brand of chocolate you use, or whether you add nuts, but the discipline to follow the steps exactly.
Try this once. Just once. Measure your sugar. Use a thermometer. Wait to stir. Let it cool. You’ll taste the difference. And you’ll never go back to the old way.
Why does my fudge turn out grainy?
Grainy fudge happens when sugar crystals form too early. Stirring the mixture while it’s still hot forces crystals to grow large. The fix: don’t stir until the fudge has cooled to 110°F (43°C). Let it sit undisturbed after cooking, then stir slowly for 2-3 minutes until it thickens. That’s when the crystals form evenly and stay microscopic.
Can I use milk chocolate instead of dark chocolate?
Yes, but it changes the texture. Milk chocolate has more milk solids and sugar, so the fudge will be softer and sweeter. It may not set as firmly as dark chocolate fudge. If you use milk chocolate, reduce the sugar by 1-2 tablespoons and make sure you cook it to the full 240°F (116°C) to compensate for the extra moisture.
Do I need a candy thermometer?
You don’t absolutely need one, but you’ll have much better results. Fudge is very sensitive to temperature. The soft-ball stage (234-240°F) is narrow. Without a thermometer, you rely on the ice water test: drop a small spoonful in cold water. If it forms a soft, bendable ball, you’re good. If it’s too runny or too hard, adjust next time.
Why does my fudge not set?
If your fudge stays soft or sticky, it didn’t reach a high enough temperature during cooking. Sugar syrup must hit at least 234°F to evaporate enough water for proper setting. Check your thermometer’s accuracy by boiling water-it should read 212°F at sea level. Also, make sure you’re using heavy cream, not light cream or milk. Low-fat dairy won’t set properly.
Can I make fudge without butter?
You can, but it won’t be as good. Butter prevents sugar crystals from growing too large, giving fudge its smooth texture. Without it, the fudge will be more like hard candy or chalky paste. If you must avoid dairy, try adding 2 tablespoons of coconut oil or vegetable shortening-but expect a different mouthfeel. It won’t melt the same way.
How long should I let fudge cool before cutting?
Let it cool at room temperature for 2-3 hours, uncovered. Cutting too soon makes it messy and sticky. If you’re in a hurry, wait at least 90 minutes. Once it’s firm to the touch and no longer shiny, it’s ready. Use a sharp knife wiped clean between cuts for clean edges.
Can I freeze fudge?
Yes, fudge freezes well. Wrap it tightly in plastic wrap, then place it in an airtight container. It keeps for up to 3 months. Thaw it at room temperature for 1-2 hours before serving. Freezing doesn’t ruin the texture if it’s stored properly.