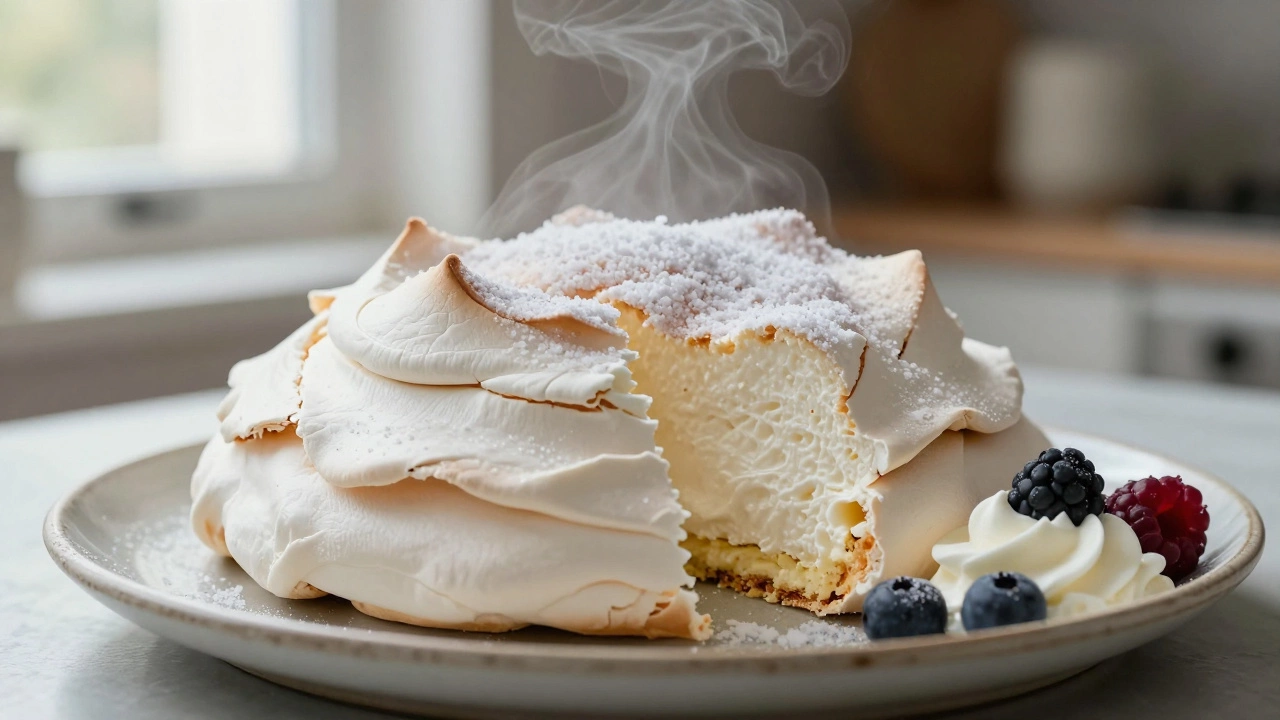
Pavlova Texture: How to Get That Ideal Crunch‑Soft Balance
When working with Pavlova texture, the contrast between a crisp outer crust and a marshmallow‑soft interior that defines this classic dessert. Also known as meringue‑based dessert texture, it relies heavily on the chemistry of egg whites, sugar, and heat. Another key player is meringue, the airy base that forms the shell and holds the airy centre together, while oven temperature, the precise heat level used to bake the Pavlova without over‑drying determines whether you end up with a perfect bite or a cracked disappointment.
Let’s break down the three big factors that shape Pavlova texture. First, the meringue itself – you need a stable foam. That means whisking egg whites until they reach stiff peaks and gradually adding sugar so the syrup coats each bubble. The sugar not only sweetens but also stabilizes the foam, giving the outer shell its signature snap. Second, the oven door strategy. Most bakers keep the door closed during the initial bake to trap steam, then open it slightly while cooling to prevent sudden condensation that makes the crust soggy. This two‑stage approach keeps the outer layer dry yet the inside tender. Finally, the finishing touches – a generous dollop of whipped cream and fresh fruit add moisture and flavor without compromising the crisp shell.
Why the Oven Door Matters for Pavlova Texture
The Pavlova oven door rule is a classic hack: keep the door closed for the first 20‑25 minutes, then crack it open about an inch for the cooling phase. This micro‑vent lets excess steam escape, preserving the shell’s crunch while letting the centre settle into that airy softness. If you keep the door shut the whole time, condensation will pool on the surface and the shell turns rubbery. Open it too early, and the heat escapes, leaving the interior under‑cooked. Finding that sweet spot is the secret behind professional‑grade Pavlova texture.
Aside from the door, the actual temperature matters too. A low‑and‑slow bake at 250°F (120°C) allows the meringue to dry out gradually, forming a thin, glass‑like crust. Too high a heat will brown the outside too fast and force the interior to collapse. Most home ovens fluctuate, so using an oven thermometer can save you a lot of trial and error. Pair the right temperature with the right timing, and you’ll get a shell that snaps when you bite but stays tender enough to hold a cloud of whipped topping.
Now, let’s talk about the role of toppings in the overall texture experience. Whipped cream adds a light, buttery layer that contrasts with the crisp shell, while fruit brings a burst of acidity that cuts through the sweetness. However, too much juice from fruit can seep into the crust and make it soggy. The trick is to add fruit just before serving, keeping the crumbs dry until the last minute. This way, the Pavlova texture you worked hard to achieve stays intact until the fork hits the plate.
Many bakers wonder if they can tweak the classic recipe to suit different textures – for example, a slightly chewier crust for a more cake‑like feel. Adding a pinch of cornstarch or a dash of cream of tartar to the meringue can give the outer shell a bit more resilience, but it also changes the traditional melt‑in‑your‑mouth feel. Knowing how each ingredient shifts the Pavlova texture lets you customize the dessert to your crowd’s preferences without losing the iconic contrast.
Below you’ll find a curated list of articles that dive deeper into each of these aspects. From the science behind keeping the shell crisp, to step‑by‑step guides on mastering the oven door technique, each post adds a piece to the puzzle of perfect Pavlova texture. Read on to turn your next Pavlova from a hopeful experiment into a show‑stopping centerpiece that dazzles both the eyes and the palate.
Learn the truth about overcooking pavlova-why it cracks, how to tell if it's ruined, and the exact baking method that guarantees a crisp shell with a marshmallow center every time.
Discover why pavlova stands out-its origin, crisp‑soft texture, key ingredients, topping ideas, and pro tips for a flawless dessert.