TL;DR
- Keep the oven door closed while baking pavlova. Opening it mid-bake causes collapse and cracks.
- When bake time ends, turn the oven off and leave the pavlova inside for 60-90 minutes (door closed). Then crack the door 1-2 cm to finish drying if needed.
- Typical settings: 150°C conventional (130°C fan) for 60-75 minutes for a 20 cm pavlova. In gas ovens, aim for Gas Mark 2 then drop to 1-1½ after 15 minutes.
- Use an oven thermometer. Many home ovens run 10-20°C off, which is why pavlovas brown or weep.
- Humidity, egg white age, and sugar dissolution matter as much as temperature. Stabilise with 1 tsp vinegar (or ½ tsp cream of tartar) and 1-2 tsp cornflour per 4 egg whites.
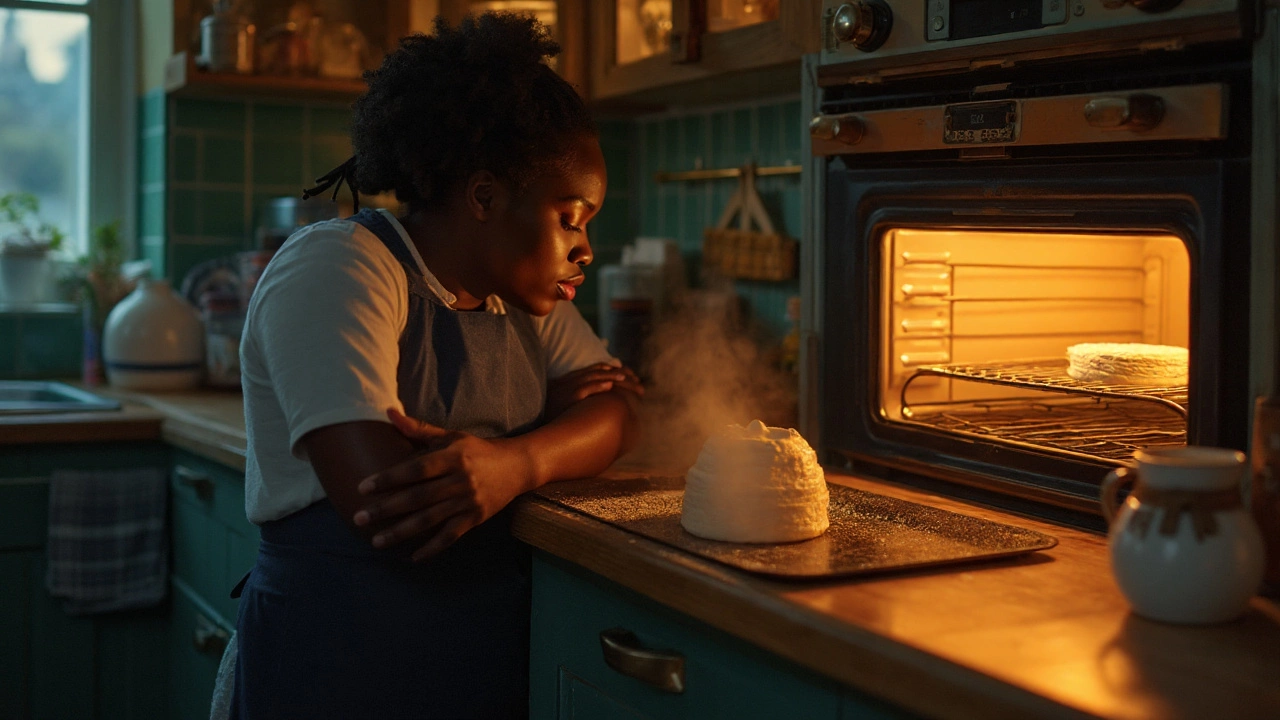
You asked if you should leave the oven door open when cooking pavlova. Here’s the straight answer: keep it shut while it bakes. Only after switching the oven off do you leave it closed to cool, then crack it slightly at the end if the shell still needs drying. That’s the rhythm that gives you a crisp shell and a marshmallow centre without the dramatic collapse.
pavlova oven door
Pavlova is a meringue-based dessert with a crisp shell and a marshmallow-soft centre, typically 18-23 cm in diameter, baked at low heat (120-150°C) and cooled in the switched-off oven for 1-3 hours. It’s traditionally topped with whipped cream and fruit, and is closely associated with Australia and New Zealand.
Meringue is a foam made by whipping egg whites with sugar. Common types include French (raw whites + sugar), Swiss (whites and sugar warmed to ~60-70°C then whipped), and Italian (hot sugar syrup ~115-120°C poured into whipping whites). Pavlova uses a French-style meringue plus acid and starch for that chewy centre.
Convection oven (also called a fan oven) circulates hot air with a fan and usually needs a 20°C lower setting than a conventional oven for the same effect. The airflow promotes faster browning and moisture loss.
Conventional oven heats from top and/or bottom elements without a fan. It can have hot spots and usually requires a higher set temperature than a fan oven for identical results.
Egg white (albumen) is a protein-rich liquid (~33 g per UK large egg) that traps air when whisked. Slightly older, room-temperature whites whip faster and to more volume than fresh, cold whites.
Caster sugar is a fine granulated sugar (particle size ~0.3-0.6 mm) that dissolves more readily in meringue, reducing grittiness and weeping. Typical pavlova ratio: 2:1 sugar to egg whites by weight.
Cornstarch (called cornflour in the UK) is a starch that tenderises pavlova and binds free moisture. Common use: 1-2 tsp per 4 egg whites, folded in at the end with acid.
Vinegar (white vinegar) is an acid that lowers egg white pH to stabilise foam. Typical dose: ~1 tsp per 4 egg whites. It’s often interchangeable with cream of tartar in meringues.
Cream of tartar (potassium bitartrate) is a dry acid that stabilises foams; use ~½ tsp per 4 egg whites if you don’t use vinegar. It helps prevent over-coagulation and reduces weeping.
Oven thermometer is a standalone probe or dial that checks actual oven temperature. Many domestic ovens are off by 10-20°C, which can cause excess browning or under-drying in pavlova.
The short answer: door closed to bake, small vent to finish drying
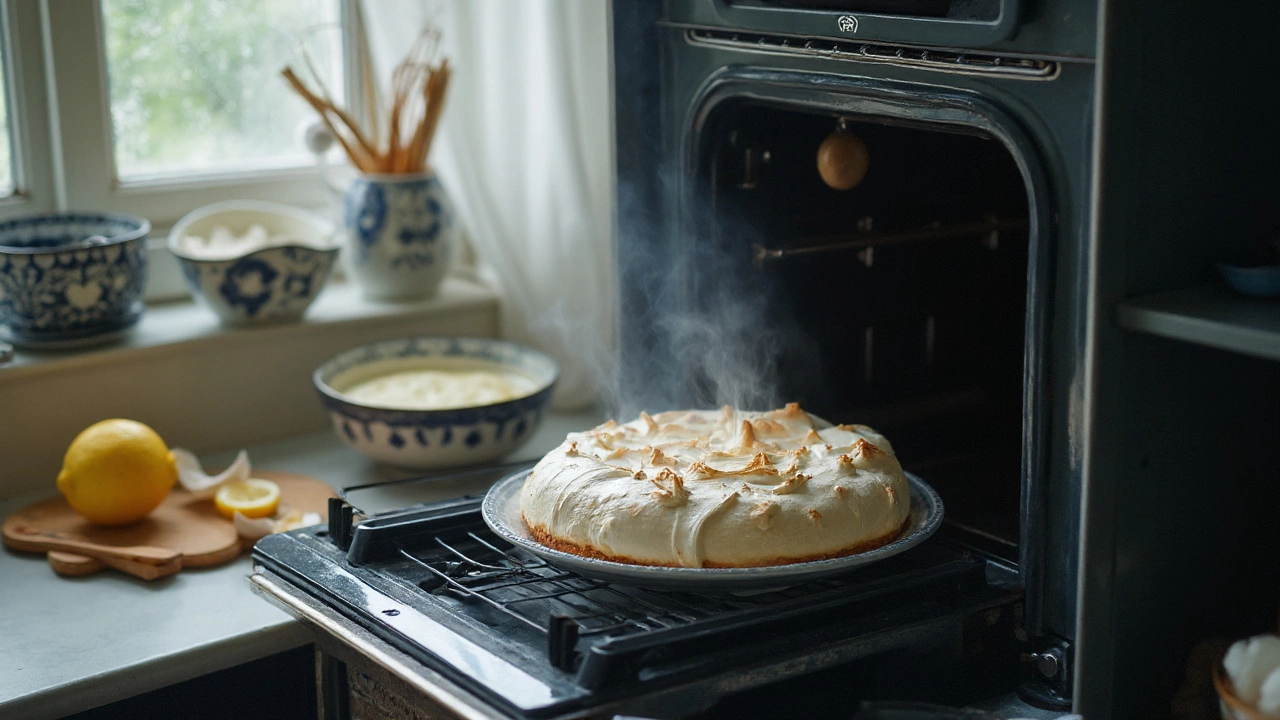
During baking, keep the door closed. Meringue structure depends on trapped steam and gradual protein setting; a sudden draft in minute 10 or 30 can deflate the foam and fracture the shell. Once the timer ends, switch the oven off and leave the pavlova inside to cool slowly (60-90 minutes, door closed). If the shell is still tacky, crack the door 1-2 cm (a wooden spoon handle works) for another 30-60 minutes to let moisture escape gently. You never bake with the door wide open.
Why this sequence works: gentle heat dries the outside while the centre stays tender. Slow cooling prevents thermal shock (big temperature drops snap the shell). A small vent at the end lets excess steam out without collapsing the structure. This approach is echoed by BBC Good Food, King Arthur Baking, and Australia’s CSIRO food science guidance.
Exact temperatures and times (UK ovens, with conversions)
- Conventional (no fan): 150°C for 60-75 minutes (20 cm base), then oven off, door closed 60-90 min.
- Fan/convection: 130°C for 60-70 minutes, then oven off, door closed 60-90 min. Fan ovens brown faster, so keep sugar fully dissolved to avoid beads.
- Gas oven: Start at Gas Mark 2 (~150°C) for 15 minutes, lower to Gas 1-1½ (~135-145°C) for the remaining 45-60 minutes. Then oven off, door closed to cool.
- Fahrenheit reference: 300°F conventional (or 265°F convection) for 60-75 minutes; cool in switched-off oven for at least an hour before cracking the door.
Step-by-step pavlova that won’t crack
- Weigh your ingredients. For 4 large egg whites (~120 g), use 240 g caster sugar, 2 tsp cornflour (6 g), and 1 tsp white vinegar (or ½ tsp cream of tartar).
- Prep the bowl. Wipe the mixing bowl with a bit of vinegar or lemon to remove grease. Any fat ruins foam.
- Whip the whites. Start on medium until foamy, then increase to medium-high to soft peaks. Add a pinch of salt if you like for flavour-not stability.
- Add sugar slowly. Rain in 1 tbsp at a time, whisking 20-30 seconds between additions. Keep whisking until the meringue is thick, glossy, and the sugar mostly dissolved (rub a little between fingers; it should feel very smooth). This can take 7-10 minutes with a stand mixer.
- Stabilise. Sift in cornflour and add vinegar (or cream of tartar). Fold gently to preserve volume.
- Shape. Trace a 20 cm circle on baking paper, flip it, and pile the meringue inside. Smooth the top and create a shallow well for cream later. Tall edges help that marshmallow middle.
- Bake. Place on a low shelf. Bake at your chosen setting (see above). Do not open the door during the bake.
- Cool slowly. Turn the oven off. Leave the pavlova inside for at least 60-90 minutes, door closed. If the shell still feels sticky, crack the door 1-2 cm for a further 30-60 minutes.
- Top right before serving. Whipped cream and fruit go on just before you eat; the shell softens quickly under cream.
Door positions and what they do
| Door position | Stage | Effect on pavlova | When (if ever) to use it | Main risk |
|---|---|---|---|---|
| Closed | Baking | Even setting, stable rise, crisp shell forms | Always during baking | Over-browning if oven runs hot |
| Closed | Initial cooling (oven off) | Prevents thermal shock; reduces large cracks | First 60-90 minutes of cooling | Shell may stay a touch tacky in humid weather |
| Slightly ajar (1-2 cm) | Final drying (oven off) | Lets steam escape to finish crisping | Last 30-60 minutes if shell feels sticky | Too wide a gap can collapse delicate shells |
| Wide open | Baking | Rapid heat loss; collapse, beading, cracks | Never during baking | Undercooked centre, weeping |
Fan vs conventional vs gas: set temps and behaviour
| Oven type | Typical set temp | Bake time (20 cm) | Traits | Watch-outs |
|---|---|---|---|---|
| Conventional (no fan) | 150°C | 60-75 min | Gentler drying, less browning | Hot spots; rotate tray once at halfway point only if your oven is well-behaved and you’re quick |
| Fan/convection | 130°C | 60-70 min | Faster moisture loss and browning | Over-browning and hollow shells if too hot; ensure sugar dissolved fully |
| Gas | Start Gas 2 → lower to Gas 1-1½ | 60-75 min | Moister environment; slower browning | Fluctuations when the flame cycles; don’t open the door during those dips |
Why pavlovas crack or weep: the science in plain English
Pavlova is all about proteins (from egg whites), sugar, water, and heat. Whisking unfolds proteins, which trap air. Sugar dissolves into the foam and stabilises it, pulling in water because sugar is hygroscopic. As heat sets the proteins, the foam becomes a shell. If the temperature spikes or drops too quickly, the structure contracts unevenly and cracks.
Common culprits and fixes:
- Thermal shock: Moving from hot oven to cool kitchen fast. Fix: cool in the switched-off oven before venting.
- Undissolved sugar: Causes weeping beads. Fix: add sugar gradually and whisk until very smooth; use caster sugar.
- Too hot: Browning quickly, hollow shells. Fix: lower by 10-20°C; fan ovens often need that drop.
- Too cold: Tacky shell and soggy base. Fix: extend bake 10-15 minutes or add vented cooling time.
- High humidity: Shell won’t crisp. Fix: pick a drier day, vent longer, store with silica packs (not touching food) or serve soon after topping.
For validation, the USDA Food Safety and Inspection Service notes that room-temperature, fresh eggs are safe to whip if baked; King Arthur Baking highlights the 2:1 sugar-to-whites ratio for stability; BBC Good Food and Australia’s CSIRO consistently recommend slow, closed-door cooling before any venting. These practices align because the physics of foams doesn’t change from Bristol to Brisbane.
Baker’s checklist (pin this on the fridge)
- Weigh: ~120 g egg whites, 240 g caster sugar, 2 tsp cornflour, 1 tsp vinegar (or ½ tsp cream of tartar).
- Room-temp whites, grease-free bowl. A speck of yolk? Start again.
- Add sugar slowly and beat until glossy and smooth to the touch.
- Bake low and slow: 150°C conventional or 130°C fan. No peeking.
- Cool in the switched-off oven (door closed) 60-90 min, then crack 1-2 cm if needed.
- Top right before serving. Leftovers soften in the fridge-still tasty, just less crisp.
Troubleshooting fast
- Shell browned too much: Your oven runs hot. Next time reduce by 10-20°C and place the tray lower. A light baking parchment shield over the top at minute 40 can help.
- Puddles or sticky beads: Sugar wasn’t fully dissolved or humidity was high. Whisk longer next time and vent during the final cool. A fan oven needs an even lower set temperature.
- Large cracks: Sudden temperature change. Do the full closed-door cool-down. Don’t move the tray while hot.
- Collapsed centre: Door opened mid-bake or underbaked. Bake at least 60 minutes for a 20 cm base and avoid opening the door.
- Gritty texture: Sugar granules survived. Switch to caster sugar and add it slowly.
Related concepts you might care about next
If this is your first pavlova, it helps to understand nearby desserts and techniques:
- French vs Swiss vs Italian meringue: French is simplest, used for pavlova; Swiss is heated for stability; Italian is the most stable, great for torched toppings.
- Eton Mess: A deconstructed take-broken meringue, cream, berries. Perfect rescue plan for cracked pavlova.
- Meringue nests: Mini pavlovas that bake faster (35-45 min) and cool quicker-ideal for beginners.
- Lemon meringue pie: Uses Italian or Swiss meringue as topping; very different bake, but the sugar-egg white-acid trio still rules.
When to leave the door ajar-and how much
Only after the oven is switched off and the pavlova has had 60-90 minutes to relax do you consider a vent. A 1-2 cm gap is enough. You’re not trying to cool it rapidly; you’re giving moisture a controlled exit. A tea towel in the crack is too wide; a wooden spoon handle is about right.
Scaling pavlova: bigger, smaller, or mini
- Mini pavlovas (8-10 cm): 35-45 minutes at 120-130°C fan, then the same slow cool; they dry faster, so don’t overbake.
- Large wreath (30 cm): 80-95 minutes at 120-130°C fan equivalent; absolute no-peek, then a very slow cool-consider an overnight cool in the oven.
- Double-layer pavlova: Bake two thinner discs; they need slightly shorter times (45-55 minutes each) and gentle handling to avoid cracking.
Ingredients that really move the needle
- Sugar type: Caster dissolves best; granulated can work if you whisk longer. Icing sugar contains starch, which changes texture-okay for dusting, not ideal for the meringue itself.
- Acid choice: Vinegar is clean and neutral; cream of tartar is precise and easy to dose. Lemon juice works in a pinch (~1 tsp per 4 whites) but adds flavour.
- Cornflour amount: 1 tsp per 4 whites keeps it soft; 2 tsp makes the centre marshmallowy. More than that gets gummy.
Storage and serving
Plain pavlova shell keeps 1-2 days in an airtight container at cool room temperature with a silica gel packet nearby (not touching food). Once topped with cream, eat within a few hours. In the fridge, the shell absorbs moisture and softens; still delicious, just less crisp.
Safety notes
- Use clean, fresh eggs. Pasteurised whites whip slower but are safe and work if you’re patient.
- Avoid plastic bowls that may hold grease. Stainless steel or glass is best.
- Don’t use the self-cleaning cycle timing trick (it’s far too hot). Low and slow is the only way.
Why your Bristol (or UK) kitchen matters
Cool, damp days in the UK can make shells sticky. Start a touch drier (add 10 minutes bake) and give yourself that final 30-60 minute slightly ajar finish. On a warm, dry summer day, you may not need the vent at all-door closed cooling may be perfect.
Next steps
- Buy a simple oven thermometer and map your oven’s hot spots with a tray of sugar or sliced bread test.
- Practice with a half-batch of mini pavlovas to learn your oven before a big celebration bake.
- Try a chocolate pavlova variation: sift 2 tbsp cocoa into the cornflour and fold through with chopped dark chocolate.
Frequently Asked Questions
Do you leave the oven door open when cooking pavlova?
No. Keep the door closed during baking. After switching the oven off, leave the pavlova inside for 60-90 minutes with the door closed, then crack it 1-2 cm only if the shell needs extra drying. Baking with the door open causes collapse and cracks.
What temperature is best for pavlova in a fan oven?
Set a fan (convection) oven to about 130°C for a 20 cm pavlova and bake 60-70 minutes. Fan ovens brown faster, so reduce by roughly 20°C compared with a conventional oven and keep an eye on colour after minute 45.
Why does my pavlova crack?
Usually thermal shock (a sudden temperature drop), opening the door mid-bake, or an oven set too hot. Slow, closed-door cooling after baking minimises cracks. A small vent at the end helps finish drying without shocking the shell.
How do I stop pavlova from weeping or getting sticky beads?
Dissolve the sugar fully by adding it slowly and whisking until the meringue feels smooth. Use caster sugar, stabilise with vinegar or cream of tartar, keep the oven slightly lower in fan mode, and dry the pavlova fully during the cooling phase.
Is cornflour necessary in pavlova?
It’s not mandatory, but 1-2 tsp per 4 egg whites helps create the marshmallow-soft centre and binds moisture, reducing weeping. If you prefer a crisper interior, use the lower end (1 tsp) or skip it and bake a touch longer.
Can I make pavlova the day before?
Yes-bake the shell the day before and store it airtight at cool room temperature. Don’t top it until just before serving. In humid weather, add a silica gel packet in the container (not touching food) to keep it crisp.
Do I need to rotate the tray during baking?
Ideally no-opening the door risks collapse. If your conventional oven has a fierce hot spot, a very quick rotate at the halfway point can help, but only if the pavlova is already lightly set on the outside and you move fast. Fan ovens rarely need rotation.
What’s the best sugar-to-egg white ratio for pavlova?
A classic ratio is 2:1 sugar to whites by weight. For 120 g egg whites (about 4 large eggs), use 240 g caster sugar. This stabilises the foam and gives a crisp shell without a sandy texture when properly dissolved.